
Captured 5 October 2026
01
The demonstration Twizz
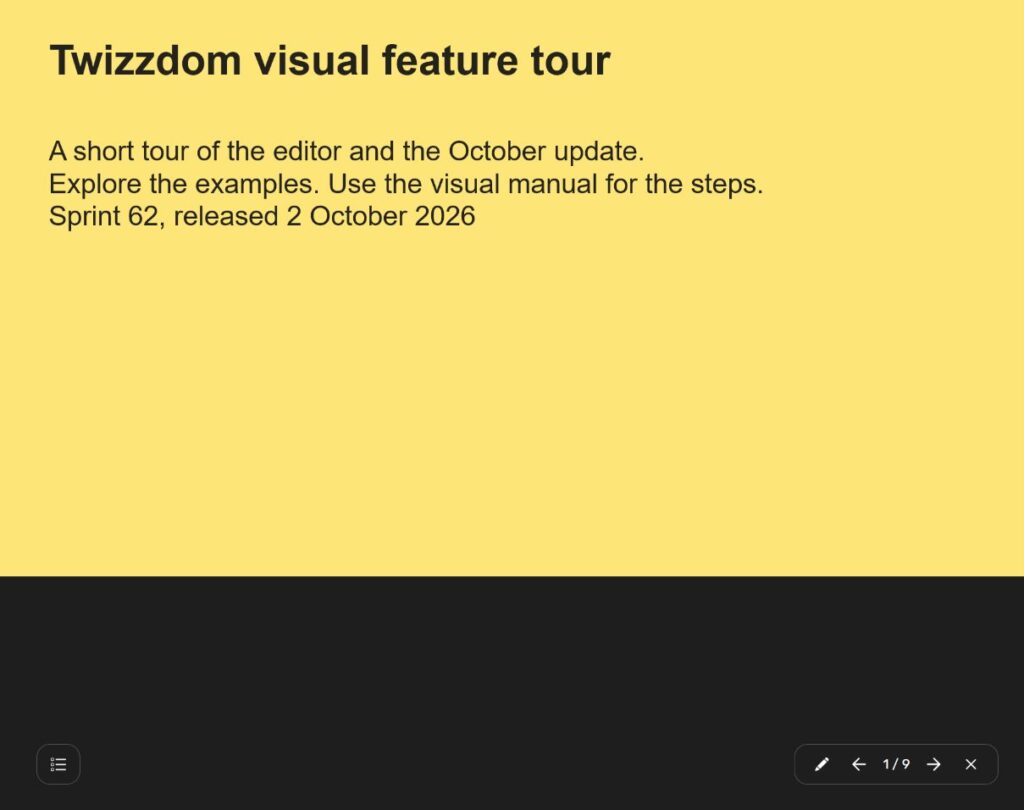
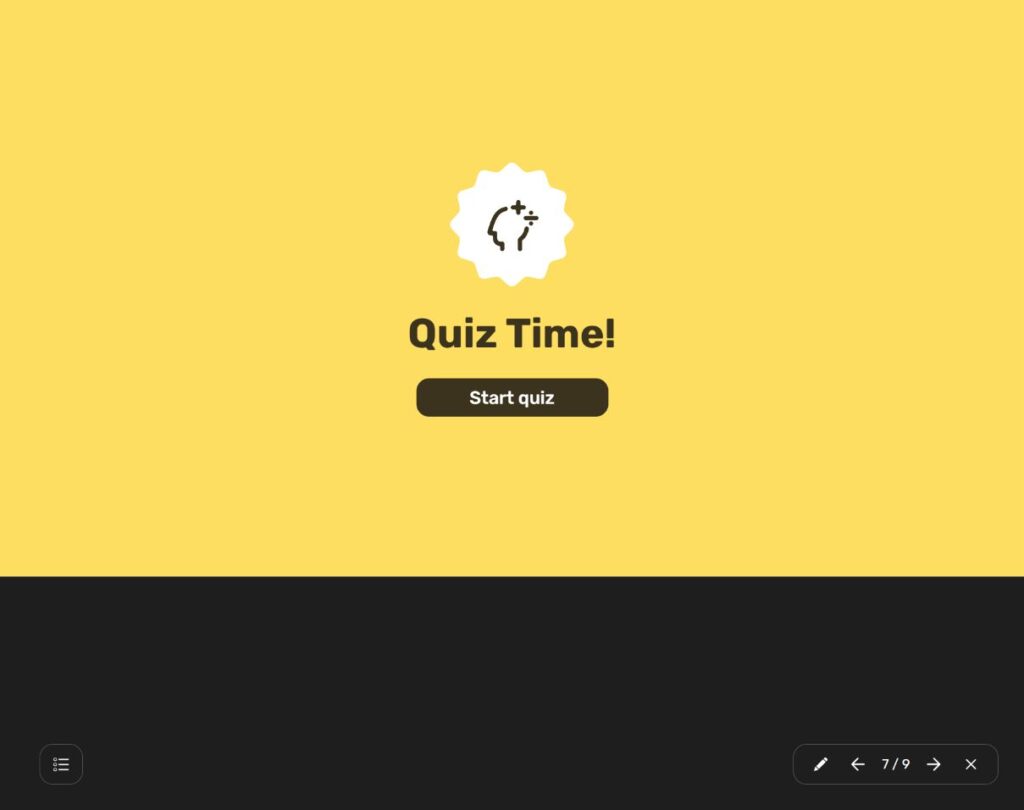
Open the nine-slide tour, then try the audio on slide 6, the quiz on slide 7 and the reveal on slide 8.
- Use the slide-list button at the bottom left to choose a slide.
- Close the slide list for a clear, full slide view.
- Use the arrows at the bottom right to move through the tour.
02
A new project or template
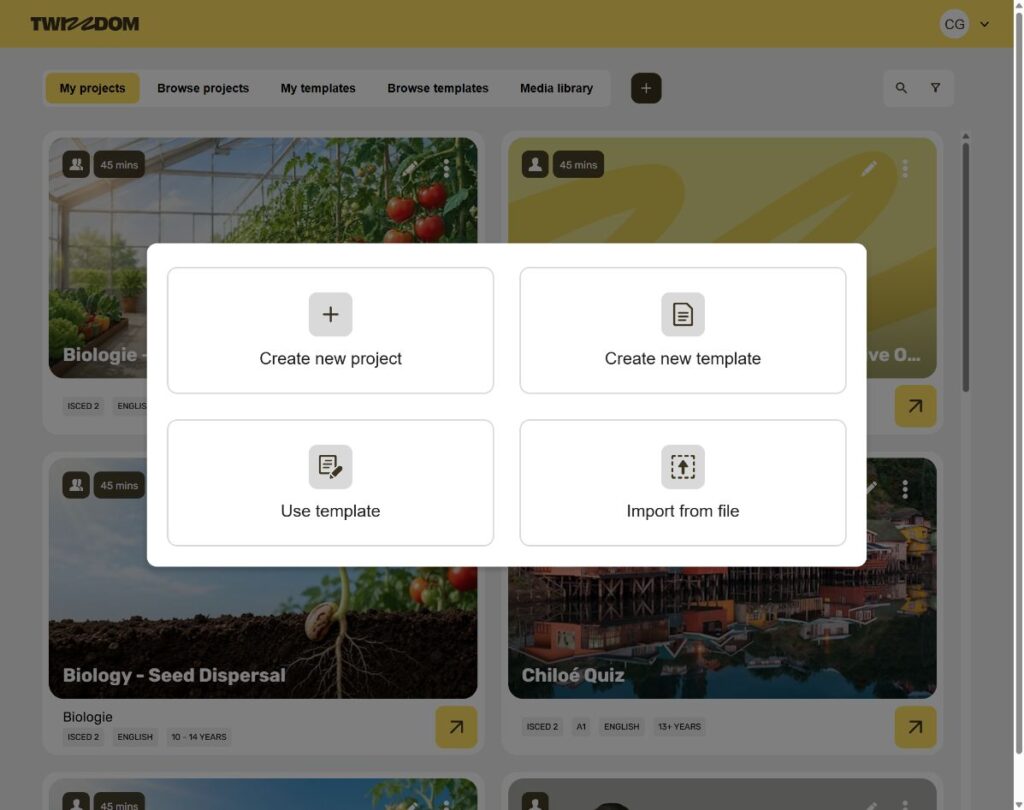
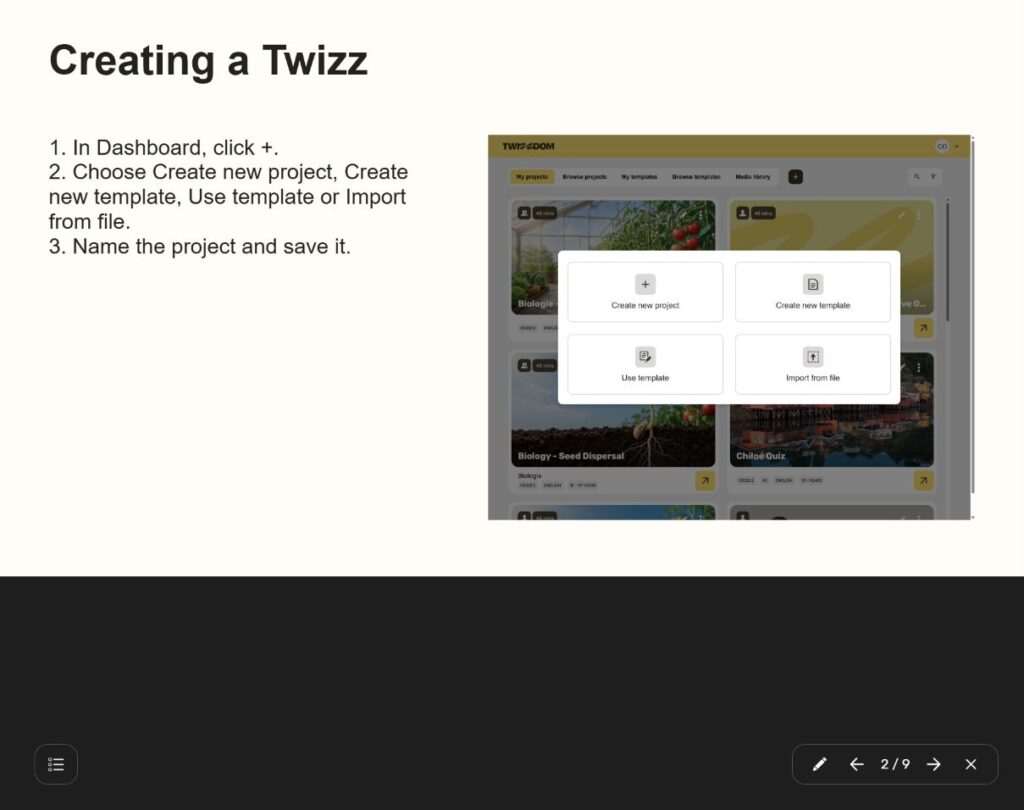
The + button on Dashboard now offers four ways to begin.
- Open My projects in Dashboard.
- Click + above the project thumbnails.
- Choose Create new project for a blank Twizz, Create new template for a reusable starting point, Use template to browse templates, or Import from file for PowerPoint.
- Click the project title at the top of Editor and type a meaningful name.
03
PowerPoint import
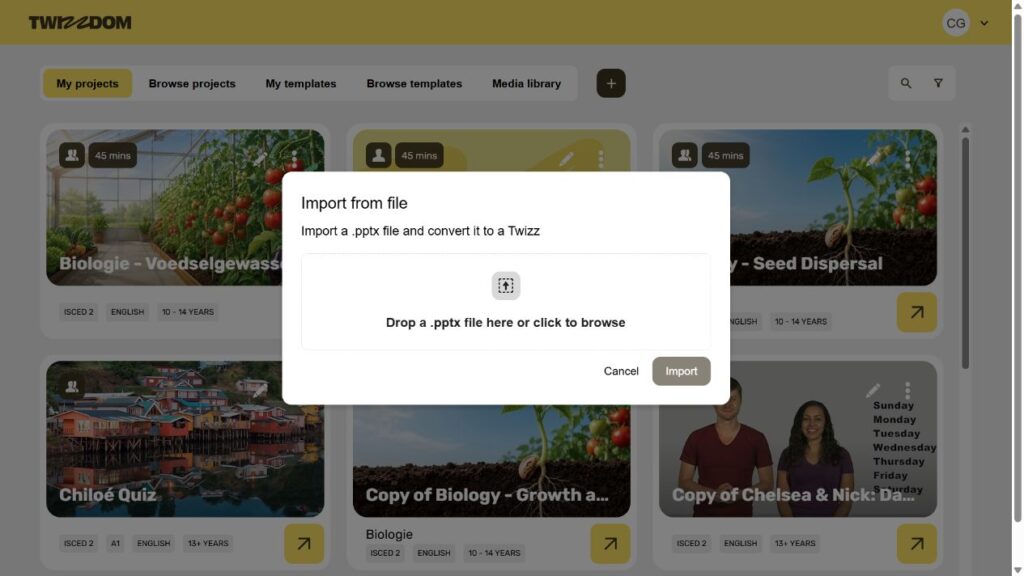
Import a modern .pptx presentation to create a new Twizz.
- On Dashboard, click +, then Import from file.
- Click the upload area and select your .pptx file.
- Click Import and wait for Import Complete.
- Click Go to project. Inspect every slide in Editor and Viewer.
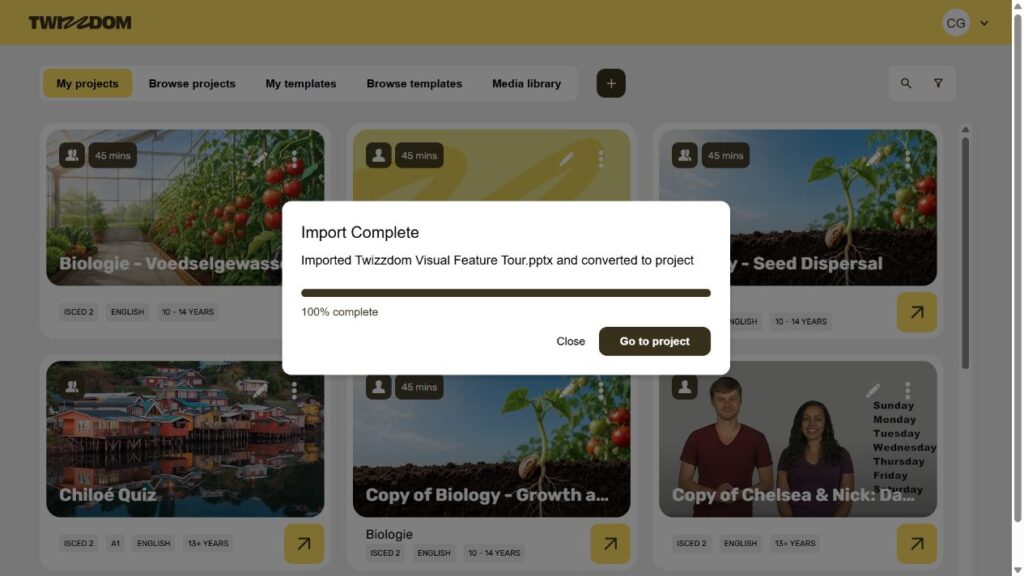
The release notes list text, images, audio, video, compatible shapes and slide background colours. Unsupported styling disappears. Unsupported fonts fall back, ultimately to Rubik. PowerPoint points and Twizzdom pixels use different numbers. Imported media uses library storage and its Description includes the source filename. A slide without compatible items becomes blank.
04
Editable text and fonts
Use native text boxes for headings, instructions, labels and numbers.
- Click Add text in the right toolbar to create a text box.
- Double-click the text box to edit it. Select the text you want to format.
- Use the font menu, numeric size field, weight and alignment controls.
- Click outside the text box to finish. Check that the text fits.
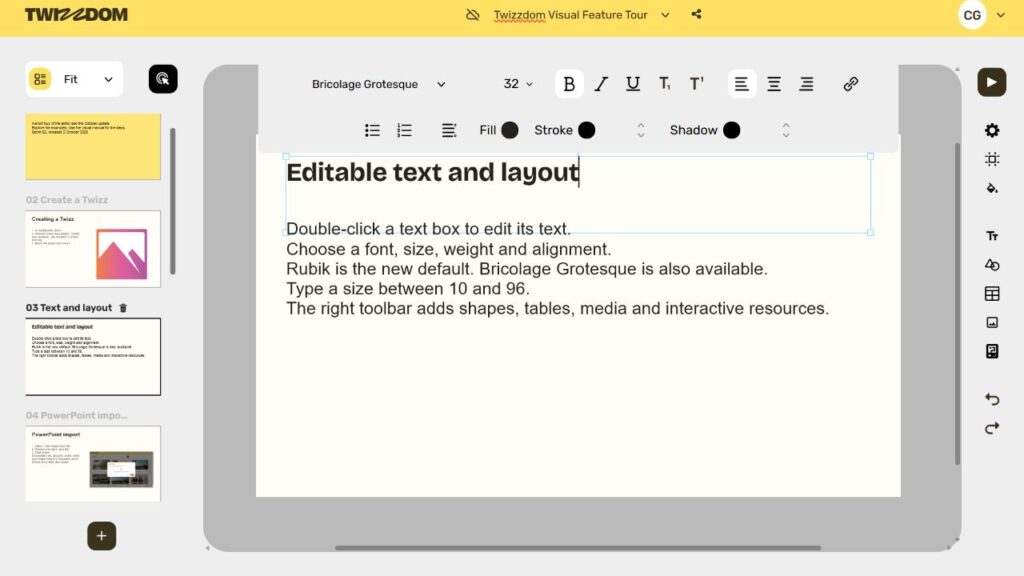
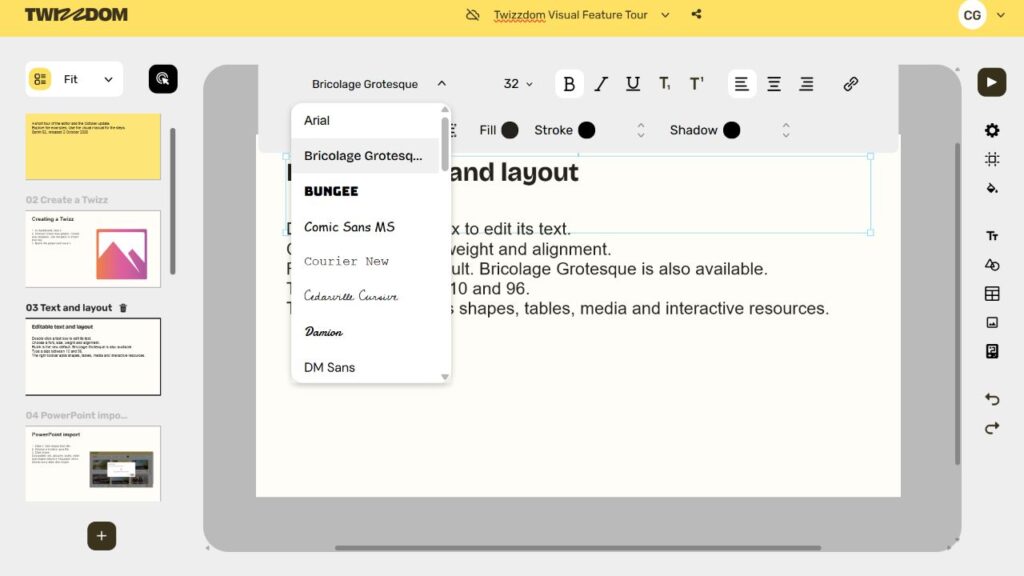
Rubik is the new default font. The numeric size input accepts 10–96. Presets include 36, 48, 72 and 96. Fill controls text colour. Stroke outlines the letters. Shadow adds a shadow. Imported text remains editable.
05
Slides, shapes and alignment
The left panel selects slides. The right toolbar adds items.
- Click + below the slide list to add a slide after the selected slide.
- Click a slide name to rename it.
- Click Add shapes and choose Rectangle, Circle, Polygon or Line.
- Select an item to move or resize it. Use Grid and snap settings to control grid visibility, Snap to items and Snap to canvas.
- Add table inserts a table. Double-click a cell to edit it. Its table toolbar controls fill and borders.
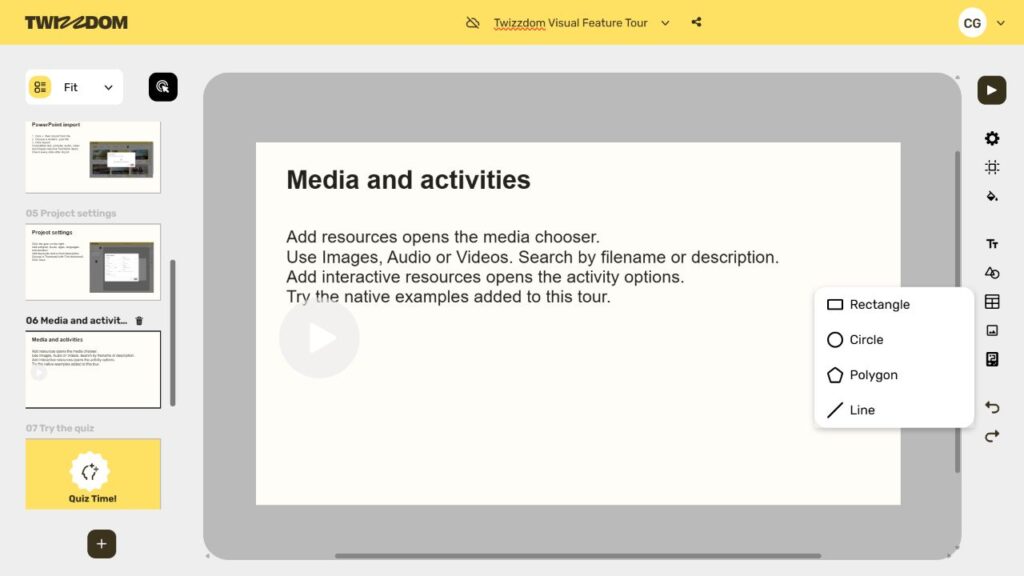
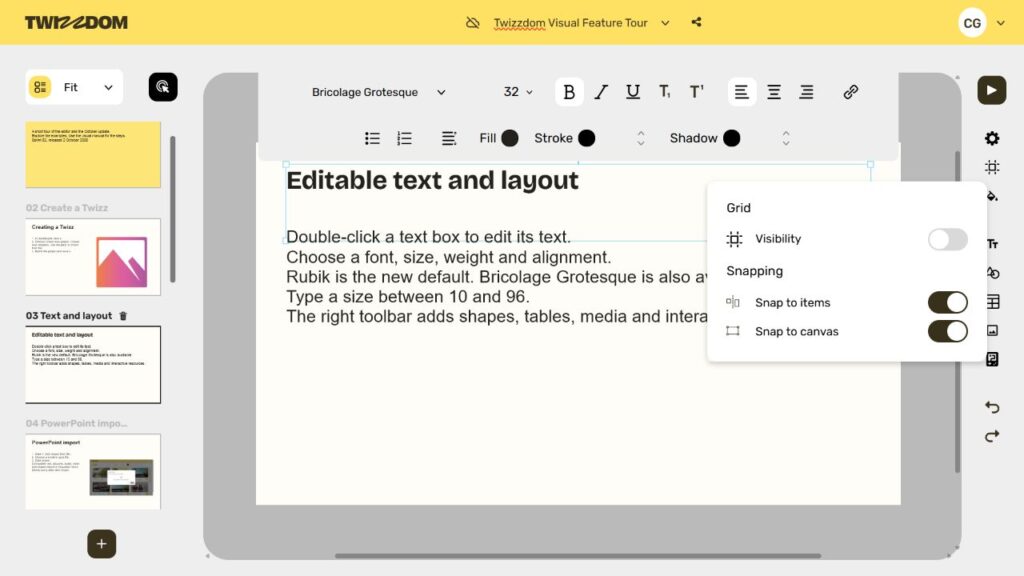
Keep an instruction as editable text beside the item it describes. Inspect the whole slide after moving or resizing.
06
Project settings and search
Metadata helps colleagues find the right Twizz.
- Click the gear on the right to open Project settings.
- Choose subjects, levels, an age range, languages and duration.
- Enter keywords individually, pressing Enter after each one. Add a description.
- Click Find thumbnail to choose an image, then Save.
- On Dashboard, use search or the filter icon to find projects by their metadata.
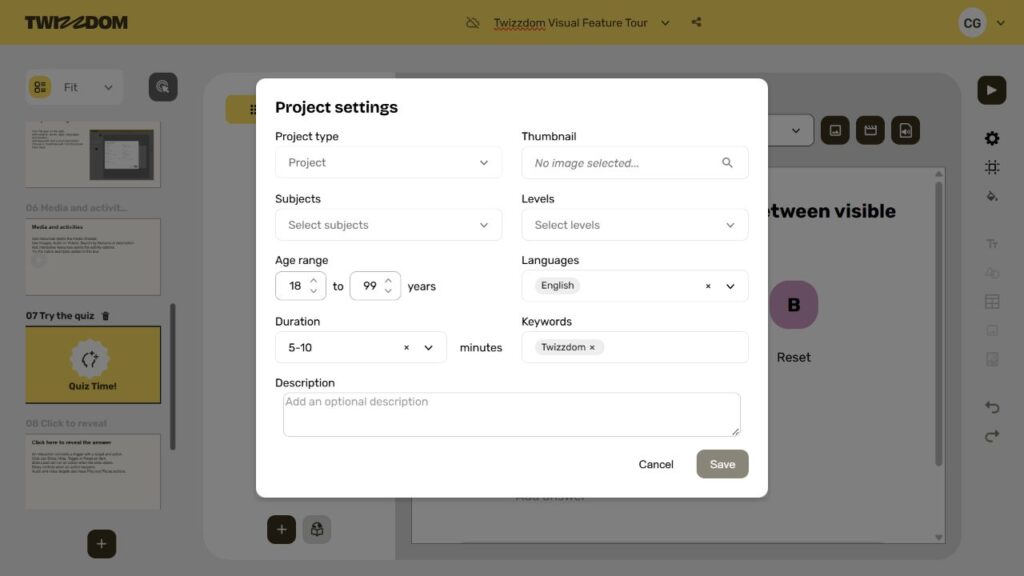
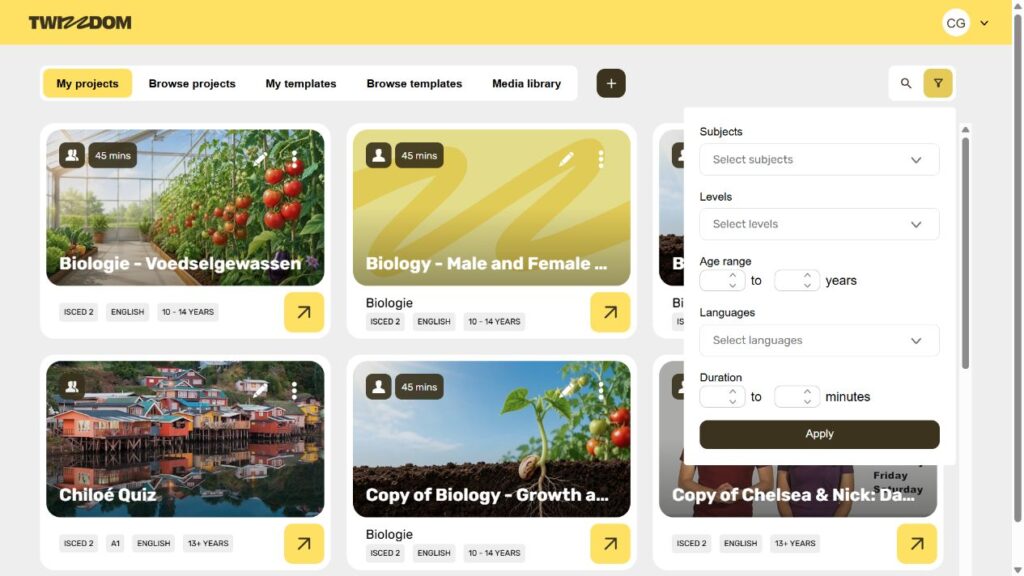
In this session, saving a combined comma-separated keyword chip caused an error. A single keyword saved successfully. The Description field did not retain the text on reopening; check your own saved result rather than assuming it persisted.
07
Images from the library
Reuse an existing image, or upload the exact file you need.
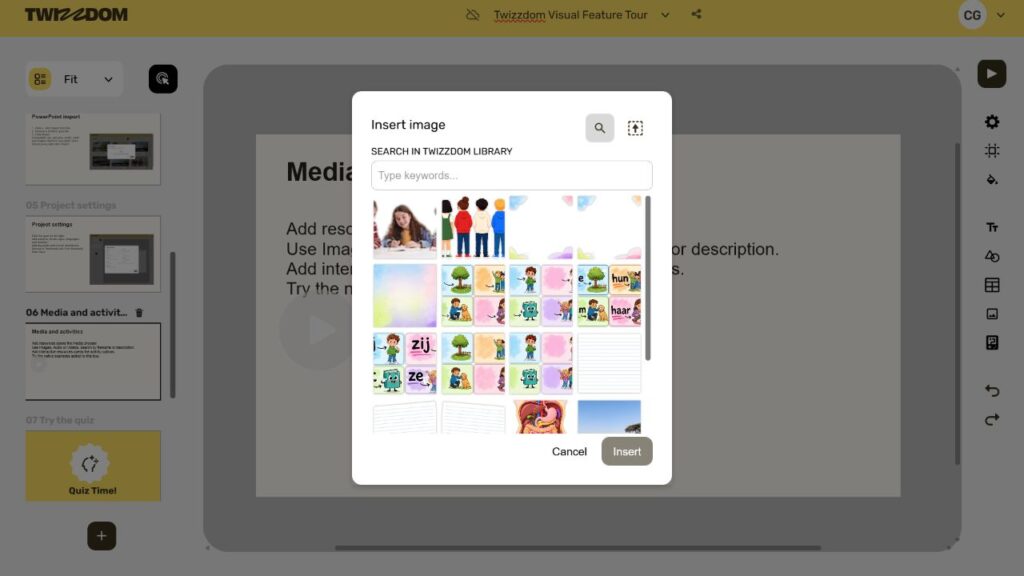
- Click Add resources, then Image.
- Type a filename or search words in SEARCH IN TWIZZDOM LIBRARY.
- Select the correct thumbnail and click Insert.
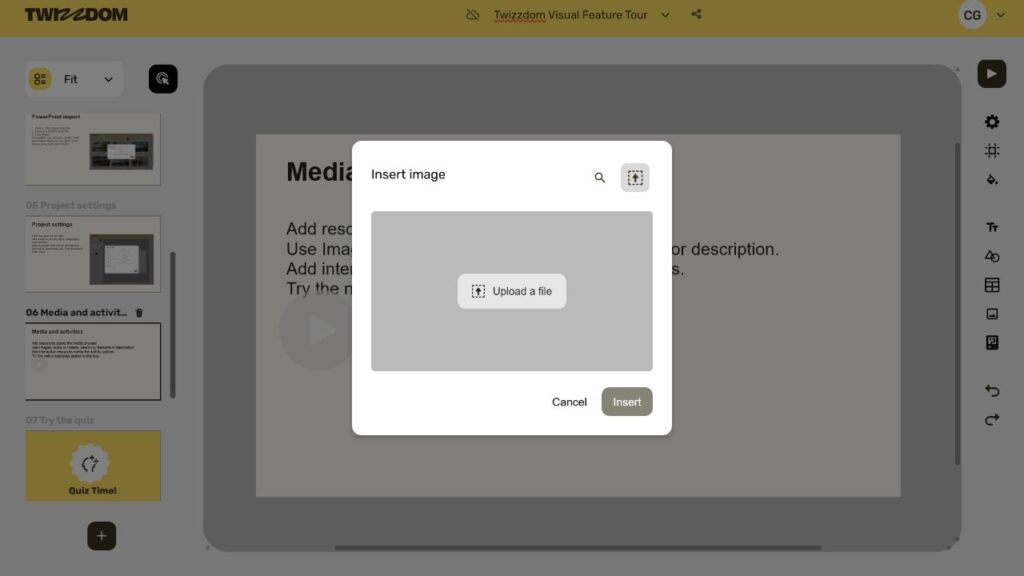
- For a local image, choose the upload icon, click Upload a file, wait for the upload and click Insert.
- Position and resize the image, then check it in Viewer.
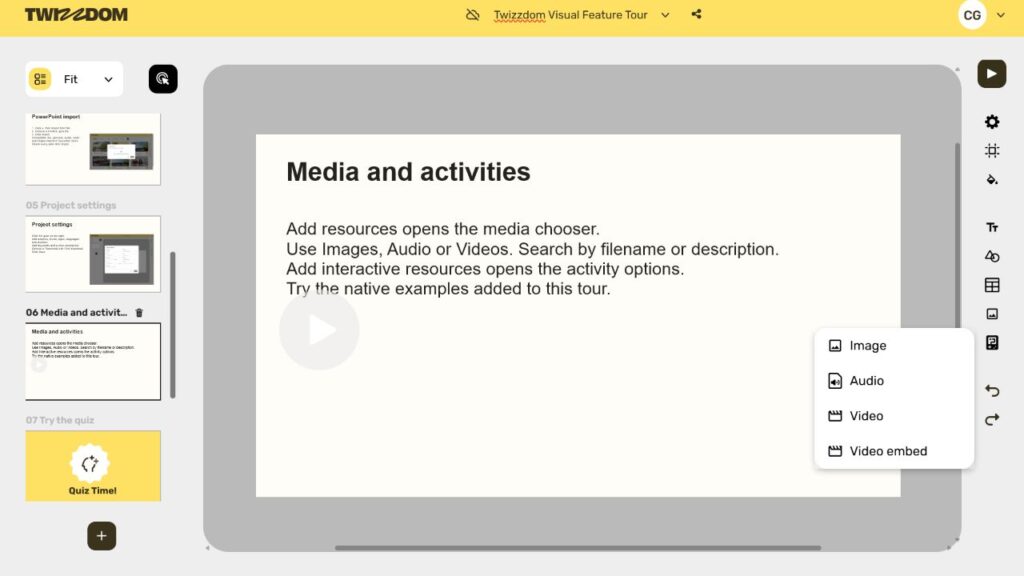
08
Audio, video and embeds
Audio and video are separate resource types.
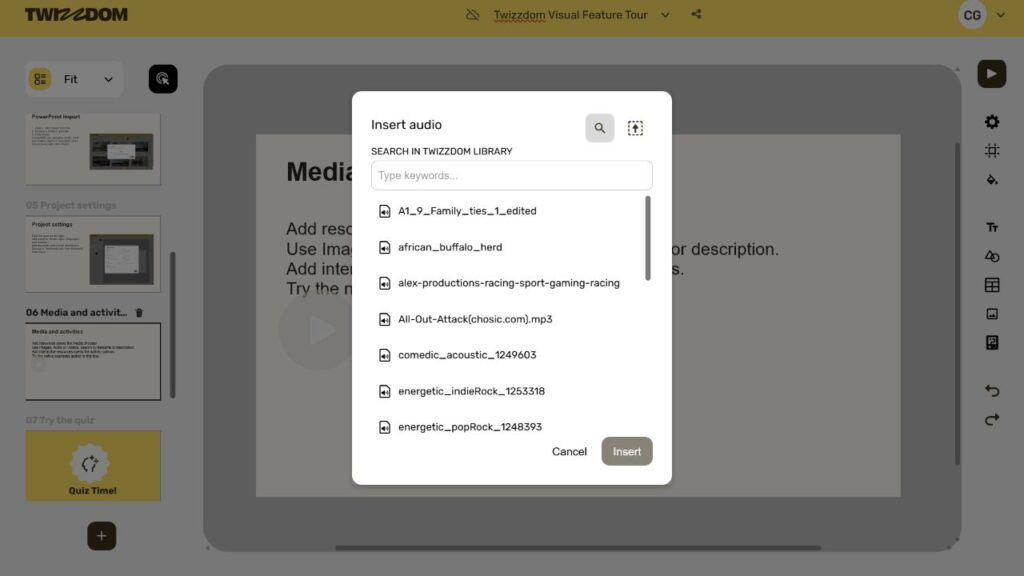
- Choose Add resources, then Audio or Video.
- Search the library, select the resource and click Insert.
- Position and resize the player on the slide.
- For a YouTube or Vimeo resource, choose Video embed, paste the permitted URL and click Insert.
- Check playback in Viewer. On tour slide 6, click the round play icon for the short sound example.
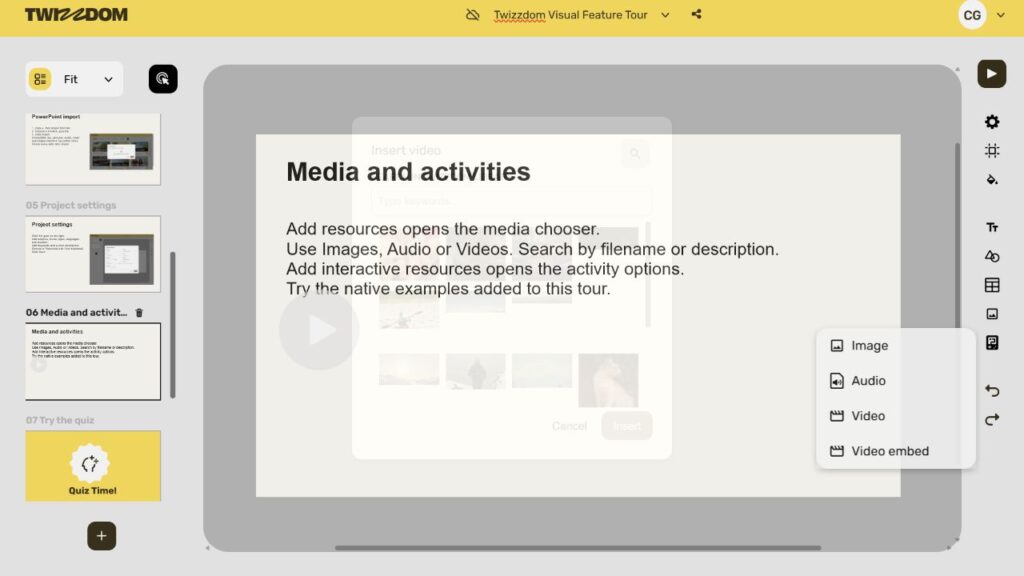
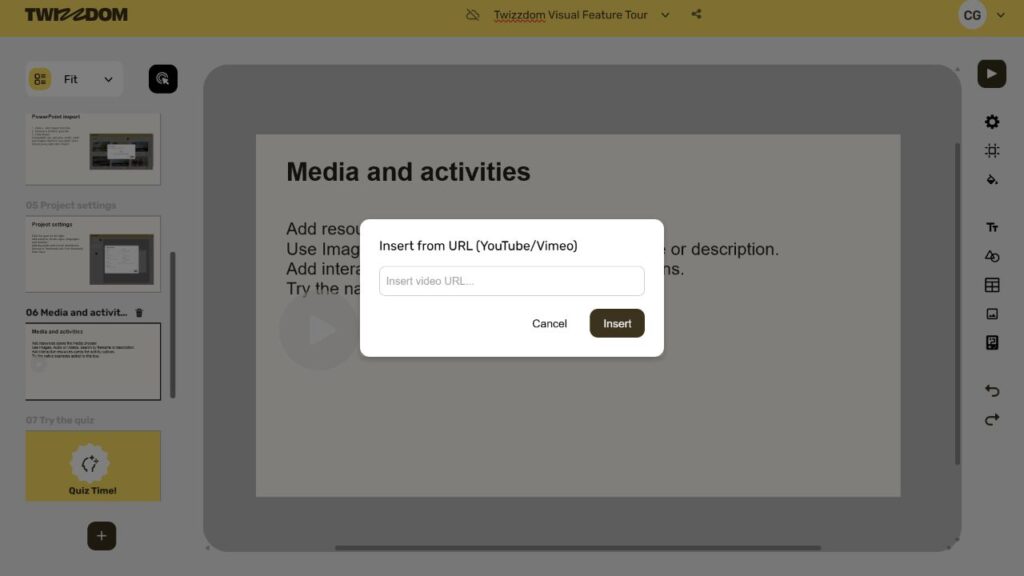
The tour contains an audio item. This manual shows video and embed insertion controls; it does not claim those media paths were playback-tested.
09
Media library and storage
Manage your uploaded files from Dashboard, under Media library.
- Read the storage bar before importing a large file.
- Search by title or Description. The new search matches separate words.
- Use Type and other filters to narrow the list.
- For imported media, search using the source PowerPoint filename.
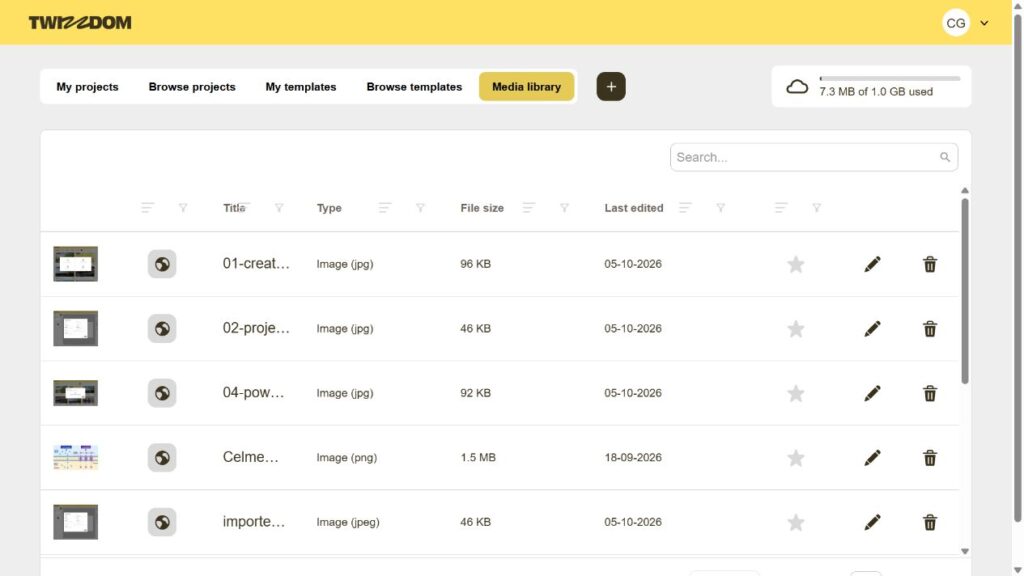
The release notes say Holmwoods employee accounts have unlimited storage. The account used for this tour displayed a 1 GB limit. Check the limit shown in your own account. If storage is insufficient, the importer rejects the import.
10
An interactive reveal
Example: a learner clicks a title to reveal an answer, then clicks again to hide it.
- Create the clickable title and the answer as two separate text items.
- Select the answer. Click the circular Events button near the top left. The panel heading is Interactions.
- Set the answer’s Initial Visibility to Hidden.
- Select the clickable title from the item list. Click Add Action +.
- Choose Trigger: Click. Choose the answer as Target. Choose Action: Toggle. Keep Delay at 0 ms. Click Save.
- Open Viewer. Click the title twice to test both states.
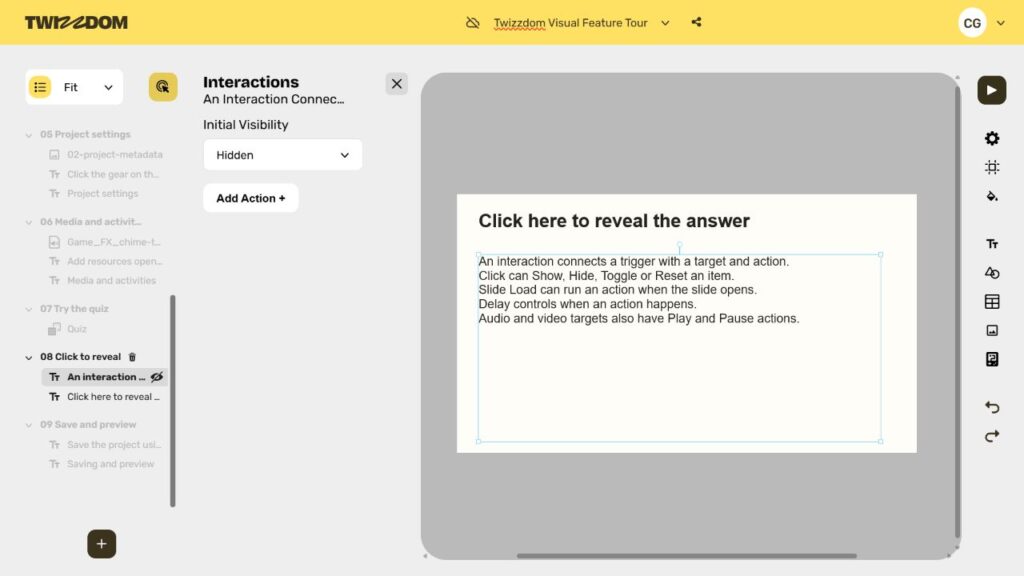
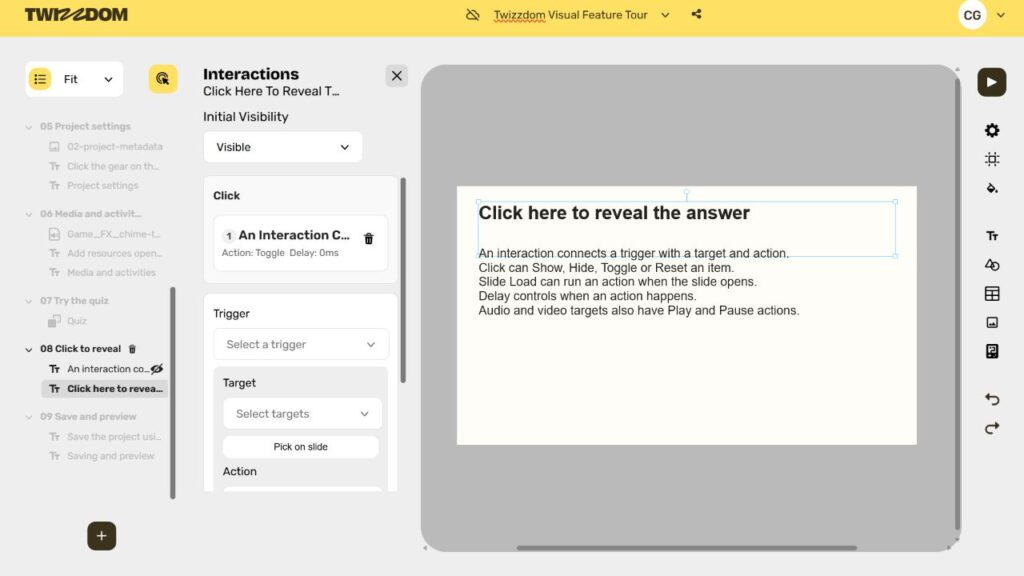
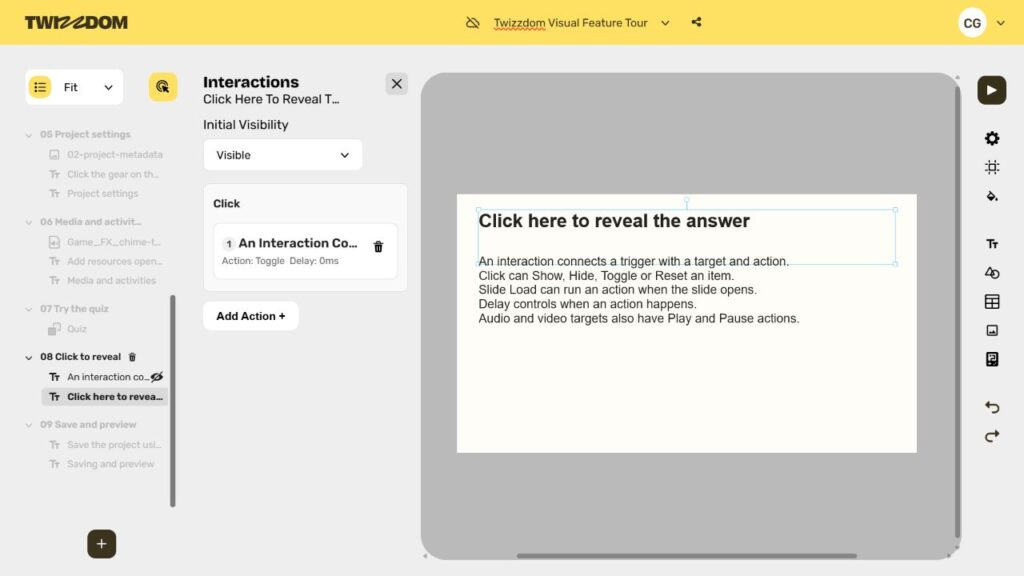
The interaction panel changes the slide thumbnails into an item list, making it easier to choose the exact target.
11
The reveal in Viewer
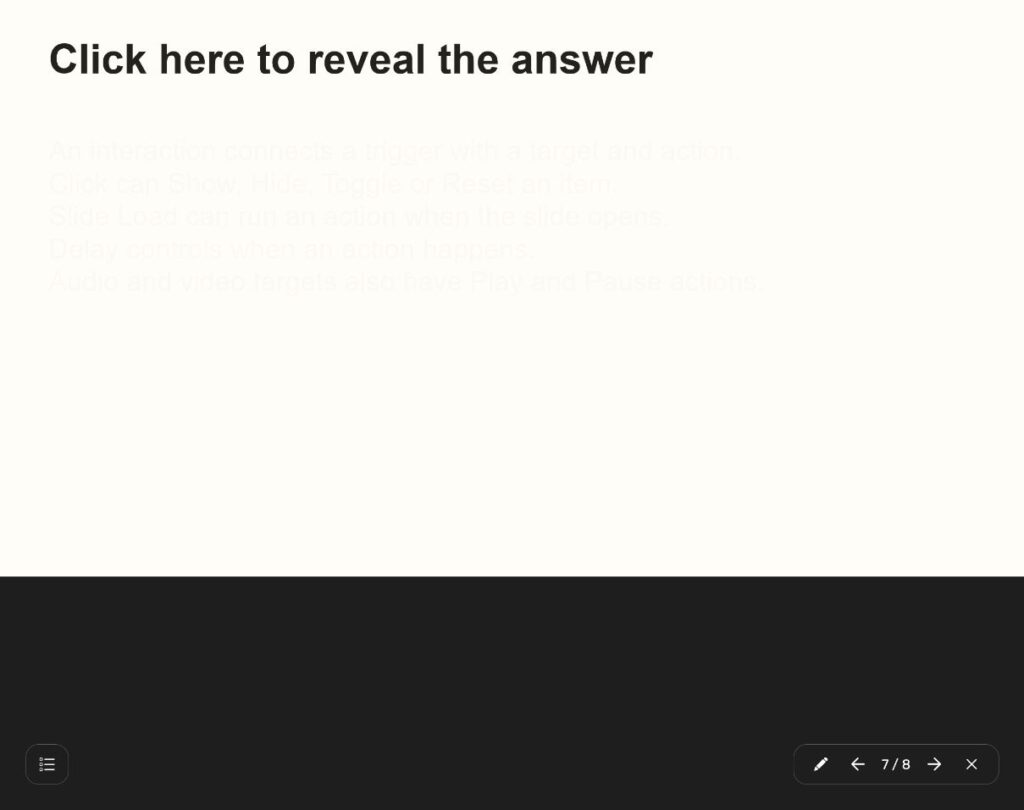
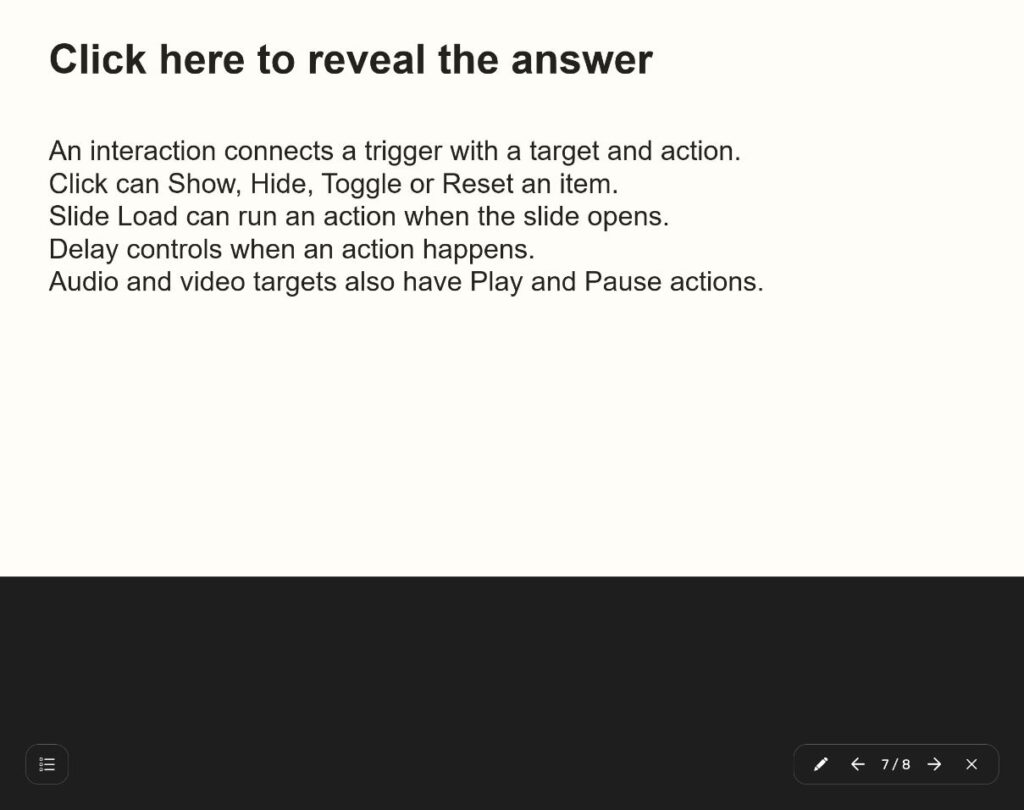
Slide 8 of the demonstration starts with only the clickable title visible.
- Open slide 8, then click the title. The explanation appears.
- Click the title again. The explanation disappears.
12
Triggers, actions and delay
Use the action that matches the result you want.
| Setting | What it does |
|---|---|
| Click | Runs when the item or canvas is clicked. |
| Slide Load | Runs when the slide opens. Available on slides. |
| Toggle | Switches visible to hidden, or hidden to visible. |
| Show / Hide | Makes the target visible / hidden. |
| Reset | Returns the target to its initial state. |
| Delay | Waits after the previous action. The field uses milliseconds: 1000 ms is one second. |
| Play / Pause Audio | Controls an audio target. |
| Play / Pause Video | Controls a video target. |
Initial Visibility controls the starting state. The release says actions are sequentially numbered and locked after adding. Plan the order before saving. If you need to correct an action, the current panel offers Delete action, then Add Action +. Future editable actions and flip-card animations are planned, rather than included in this release.
13
Quiz creation
A quiz needs its own empty slide.
- Add an empty slide. Choose Add interactive resources, then Quiz.
- Click Add question, or use Import questions to reuse a library question.
- Choose Multiple Choice, True / False or Open.
- Type the question and answers. Mark the correct answer for scored questions.
- Use Add answer for more options. Set Randomize answer order as required.
- Save the project, then open Viewer to test the quiz.
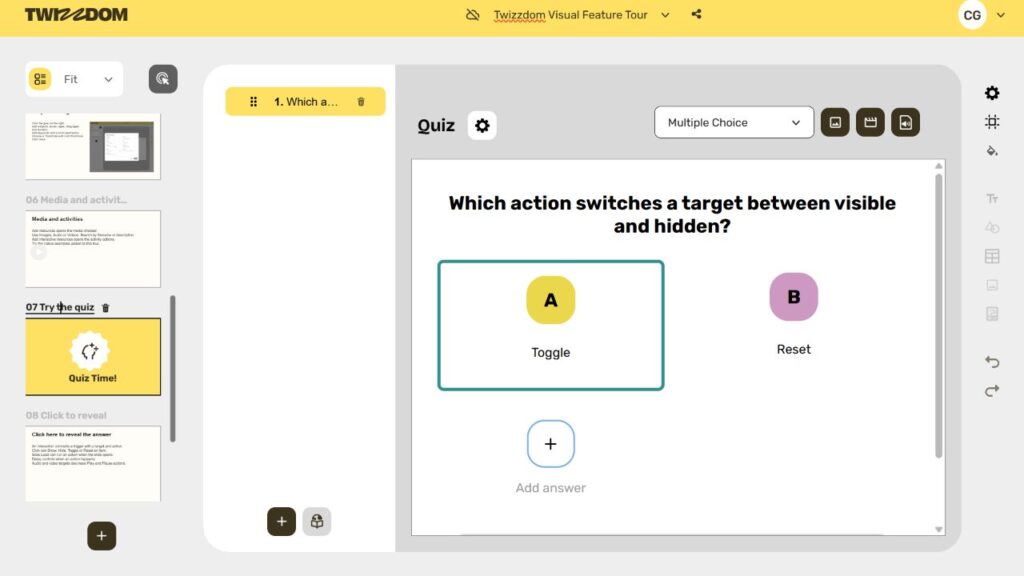
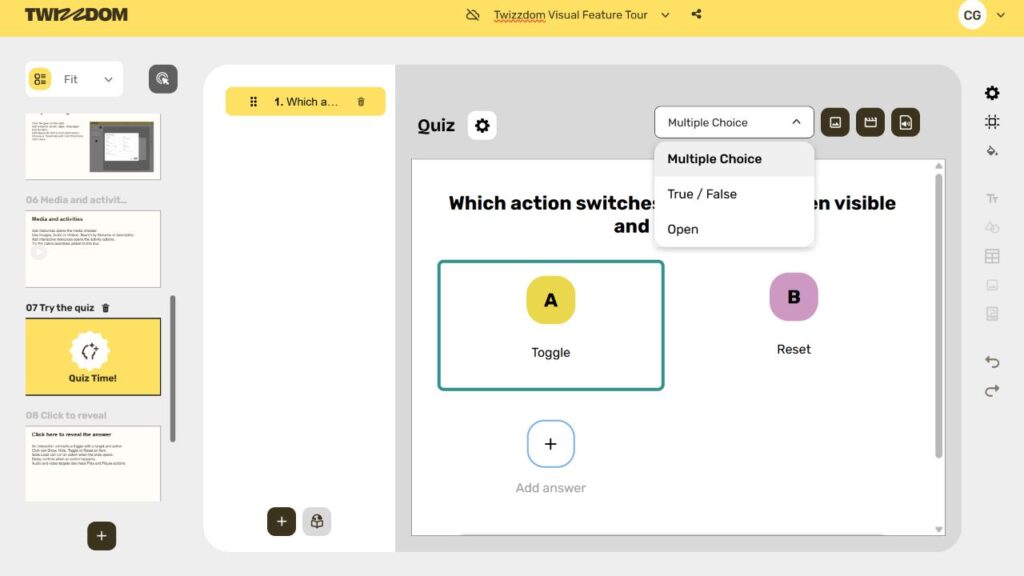
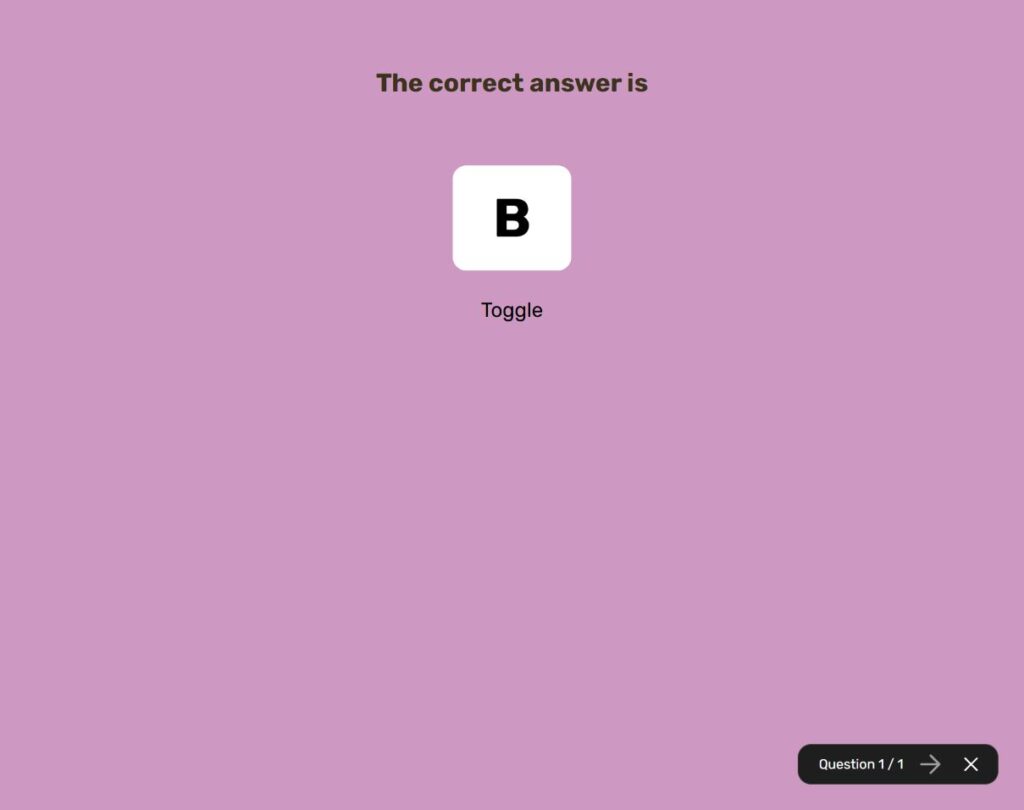
The tour’s question asks which action switches visibility. Toggle is correct. Randomised ordering may change its answer letter in Viewer. Fill required fields before leaving a new question.
14
A live classroom quiz
Start quiz opens a classroom session with a join code and QR code.
- In Viewer, open the quiz slide and click Start quiz.
- Learners open the displayed URL or scan the QR code, then enter their name.
- Use the Start arrow when learners have joined.
- Learners submit an answer on their device. Use Next to reveal the correct answer.
- Close Quiz when finished.
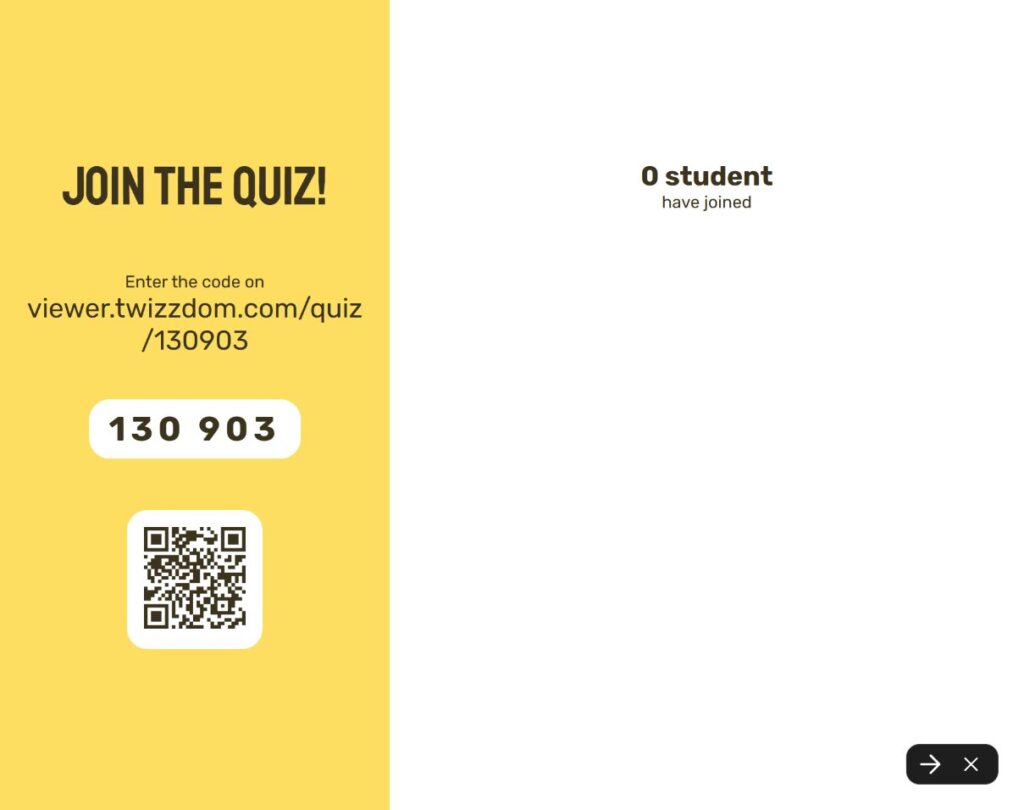
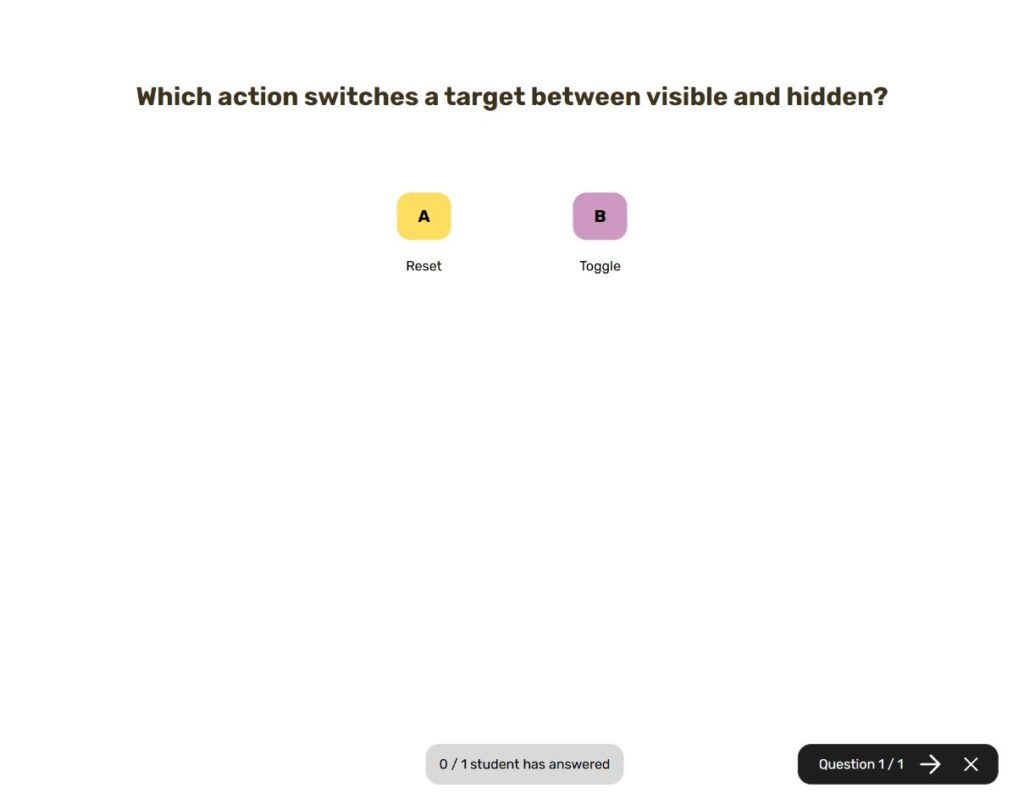
The displayed code belongs to a completed demonstration session. Start a new session to obtain a current code.
15
Games and custom code
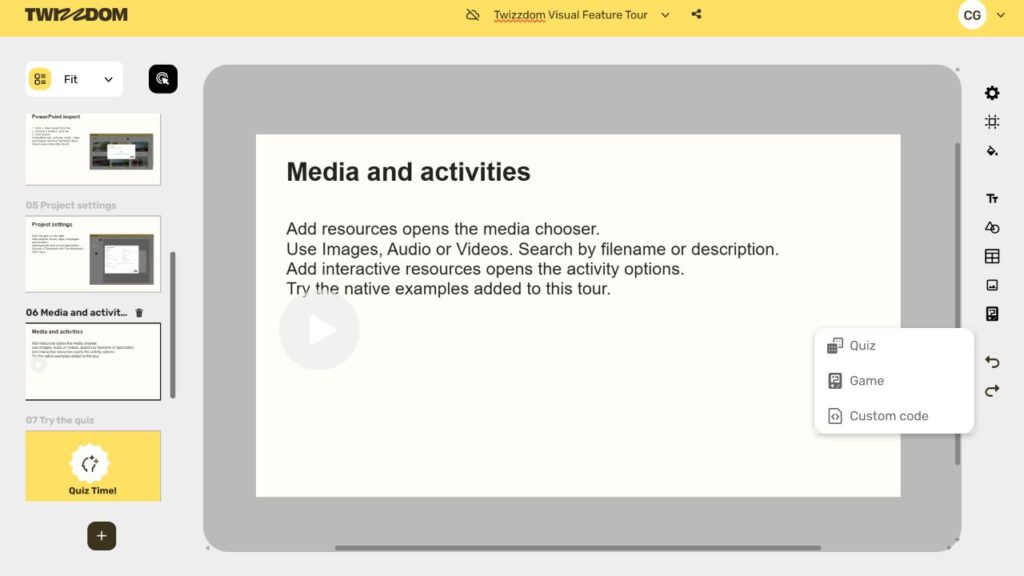
Add interactive resources also offers Game and Custom code.
- Select the appropriate slide, then open Add interactive resources.
- Choose Game to inspect the game options, or Custom code where your role permits it.
- Follow the selected resource’s own configuration, then check it in Viewer.
The menu is visible in the quiz-creation screenshot. Game configuration and custom-code execution were not tested for this manual. Crossword reveals, word searches, gaps and flip cards can also use the new visibility interactions.
16
Save, preview and repair an image
Check the saved result before handing over a Twizz.
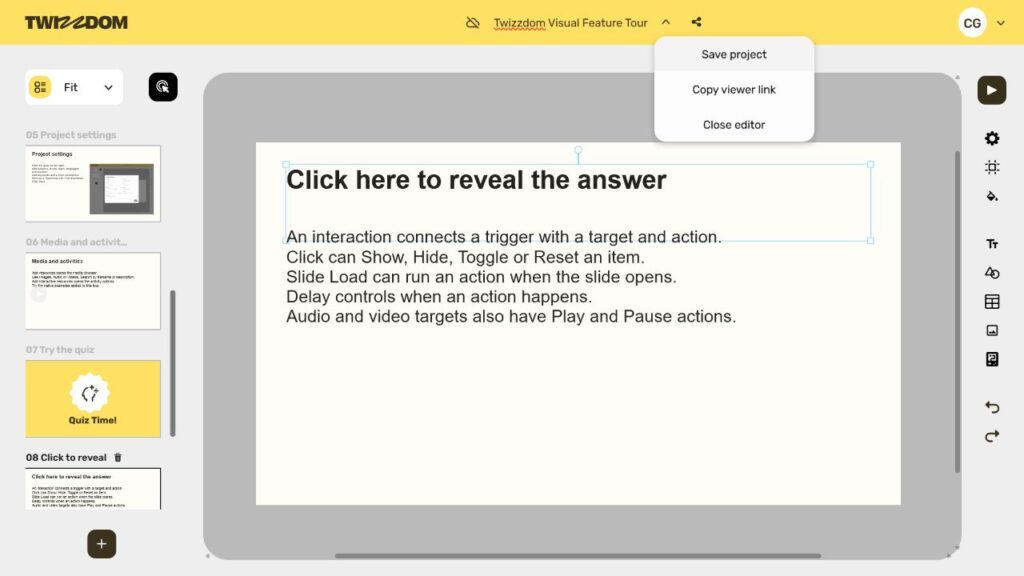
- Open the menu beside the project title and choose Save project.
- Click Open in viewer, or use Copy viewer link from the project menu.
- Check text fit, images, media and every interaction.
- If an imported image is broken, right-click it in Editor and choose Replace item. Upload or select the correct image and click Insert.
- Save again, then reopen Viewer to confirm the replacement.
This tour imported successfully, but its three imported images initially showed broken placeholders. Direct image replacement restored them. All nine saved slides were inspected in Viewer. The reveal and quiz were tested. Sharing permissions were not changed.
17
Account access and the rest of Sprint 62
The release also improves account access and everyday reliability.
| Feature | How to use it or what changed |
|---|---|
| Registration | Use Register on the sign-in page. Welcome and verification emails follow registration. |
| Email verification | Optional at sign-in. The verification link lasts 7 days. Check verification status in Profile. Resend verification email is planned. |
| Forgot password | Use Forgot your password? on the sign-in page. The emailed reset link lasts 24 hours. |
| New thumbnail | New projects use the Twizzdom logo instead of the subway image. |
| Autosave | The release fixes saving a new quiz with required fields empty. Complete those fields before using the quiz. |
| Grouped items | The release fixes grouped items not persisting after refresh. |
| Audio multiselect | The release fixes selecting multiple audio items. |
| Library details | Pagination alignment and favourite state after renaming have fixes. |